 windowarea.com
We may be compensated if you purchase through links on our website. Our team is committed to delivering honest, objective, and independent reviews on home products and services.
More
Project details
Skill
4 out of 5Moderate to HardWorking on a sloped roof is never easy.
Cost
Estimated Time
Have you noticed water stains around your skylight? Or maybe it doesn’t open as easily as it used to? If so, it might be time to replace your skylight.
Homeowners with DIY experience may be able to take on this project, but it requires careful planning and execution. In this guide, we’ll show you how to replace a skylight, from removing the old unit to flashing the new one for a watertight seal. Keep reading and check out the video from This Old House general contractor Tom Silva, who demonstrates the steps you can take for a successful skylight replacement.
Preparing for Skylight Replacement
Gathering the tools and items you’ll need to replace your skylight before you get started will make the project easier and faster to complete. We’ll cover the stuff you need and some safety tips in this section.
Tools and Materials You’ll Need
To replace a skylight, you’ll need a new skylight unit and an aluminum flashing kit. The new unit may come with the nails you need to install it, but double-check to make sure. You’ll also likely need the following tools.
 Staging planks and roof brackets
- Fall protection harness
- Flat pry bar
- Miter saw
- Cordless drill/driver
- Pneumatic nailer
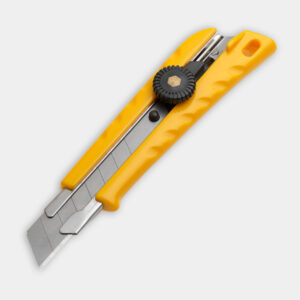
- Utility knife
- Caulk gun


Safety Precautions
This job requires you to work on the ground and the roof, so take the following steps to stay safe:
- Install roof brackets and a staging plank for secure footing
- Use a roof ladder hooked into the ridge for added stability
- Wear a fall-protection safety harness
- Work with a partner
Step 1: Removing the Old Skylight
Before you can install a new skylight, you’ll have to remove the old one and prepare the opening.
Removing Shingles
Start removing the shingles around the skylight, starting from the top and working your way down. Remember to take your time removing the shingles so that they remain intact and can be reused after you’ve installed the new skylight.
- Remove two to three courses of shingles above the skylight to leave plenty of room to install new flashing.
- Carefully pry off shingles down both sides, exposing at least 12 inches of roof deck. Get under the nail to pry the shingles loose.
- Place the removed shingles in a safe place to reuse them later.
Extracting the Old Skylight
Once you’ve removed the shingles, it’s time to extract the old skylight.
- Use a flat pry bar to loosen the old skylight from the roof opening.
- Carefully lift and remove the old skylight unit.
- Inspect the roof opening for any damage or rot that needs to be addressed before installing the new skylight.
Step 2: Installing the New Skylight
After removing the old skylight, you can begin installing the new unit. You’ll need to prep the new skylight before carrying it onto the roof.
Preparing the Skylight
Before placing the new skylight in the roof opening:
- Attach extension jambs to the grooves running around the inside of the skylight frame.
- Screw filler strips alongside the extensions on all four sides of the frame.
- Glue and nail wood trim on top of the extensions, cutting them to fit the size of the existing roof opening.
Flashing the Bottom of the Opening
Installing flashing will help you prevent leaks. Here’s where to start:
- Apply a strip of self-sealing membrane along the roof shingles directly below the skylight opening.
- As you’re applying the membrane, make sure it overlaps the upper edge of the shingles. If the flashing is under the shingles, water will go under it if something fails.
- This initial flashing creates a watertight seal at the bottom of the skylight.
Setting the Skylight in Place
After you install that bottom flashing, you’re ready to insert the unit.
- Carefully lower the new skylight into the roof opening and make sure it’s centered.
- Drive 1.5-inch roofing nails through the nailing flange on the skylight, spacing them 6 to 8 inches apart.
- Check that the skylight is level and securely fastened to the roof deck.
Step 3: Flashing and Waterproofing
Now that your skylight is in place, you’ll want to install flashing to waterproof the area surrounding it. Even though you’ve already put some self-sealing membrane on the bottom, you’ll want to reinforce it with more around the rest of the unit. Then, you can install the step flashing.
Applying Self-Sealing Membrane
Continue the waterproofing process by taking these steps:
- Apply a strip of self-sealing membrane along the bottom of the skylight, overlapping the previous membrane and extending up onto the skylight frame.
- Cut short pieces of membrane to fit along each side of the skylight, overlapping the bottom piece.
- Press the membrane firmly to get a good seal.
Installing Step Flashing
Your skylight may have come with pre-bent step flashing, but you can purchase it separately if it isn’t part of the kit. Step flashing helps direct water away from the skylight. Follow the tips below when you’re ready to install it:
- Place a piece of flashing on top of each shingle, nailing it to the side of the skylight.
- Begin reinstalling roof shingles at the bottom of the skylight.
- Continue alternating shingles and step flashing up both sides of the skylight.
- Line the skylight’s top with the self-sealing membrane, covering any voids you’ve spotted between the paper and the membrane.
Completing the Flashing
Finish by installing counter flashing along the bottom of the skylight. Make sure it’s flush against the bottom and sides of the unit for a watertight connection. Nail the top piece of counter flashing into place after you’ve confirmed that it has a tight seal.
Step 4: Finishing Touches
Now that you’ve just installed the skylight and reinforced the area with flashing for a watertight seal, you have a few more steps to take.
Reinstalling Shingles
Carefully reinstall the shingles around the skylight:
- Start at the bottom and work your way up, ensuring proper overlap.
- Nail shingles in place, being careful not to puncture the flashing.
- Replace any damaged shingles with new ones as needed.
Interior Trim Work
You may have already included the reveal trim, but you’ll still have to:
- Caulk around the inside of the skylight trim to create a finished look.
- Paint the trim to match your interior decor if desired.
Our Conclusion
Replacing a skylight can be difficult, but by taking the steps we’ve outlined above, you’ll have an easier time installing the new unit. We recommend you follow the skylight’s manufacturer’s instructions and take all the safety precautions available, such as hooking the ladder into the ridge and wearing a harness. Consider hiring a professional if you don’t have a lot of DIY experience or you lack the proper tools and safety precautions.
Source: https://www.thisoldhouse.com/ceilings/21016979/how-to-replace-a-skylight
You may also like

