 windowarea.com
Project details
Skill
1 out of 5EasyThe cuts and assembly are simple
Cost
Estimated Time
Board-and-batten shutters are one of many types of external shutters, but are known for their distinctive, classic look. If you want to make your own on a budget, it’s a relatively straightforward do-it-yourself (DIY) project and only takes a few hours. This can be a serious cost saving over other shutter options like estate shutters that can cost around $220 each.
Below, we’ll walk you through the process of creating your own custom board-and-batten shutters, providing tips on materials, tools, and techniques for a successful project.
Prepping for Your Board-and-Batten Project
Creating board-and-batten shutters involves cutting boards to size, creating dadoes for the battens, and assembling the pieces to form sturdy, attractive shutters. Before beginning, accurately measure your window openings and gather these tools.
Tools You’ll Need
 Circular saw
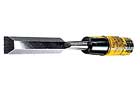
- Chisel
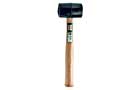
- Mallet
- Jigsaw
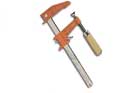
- Bar clamps


Measuring the Windows
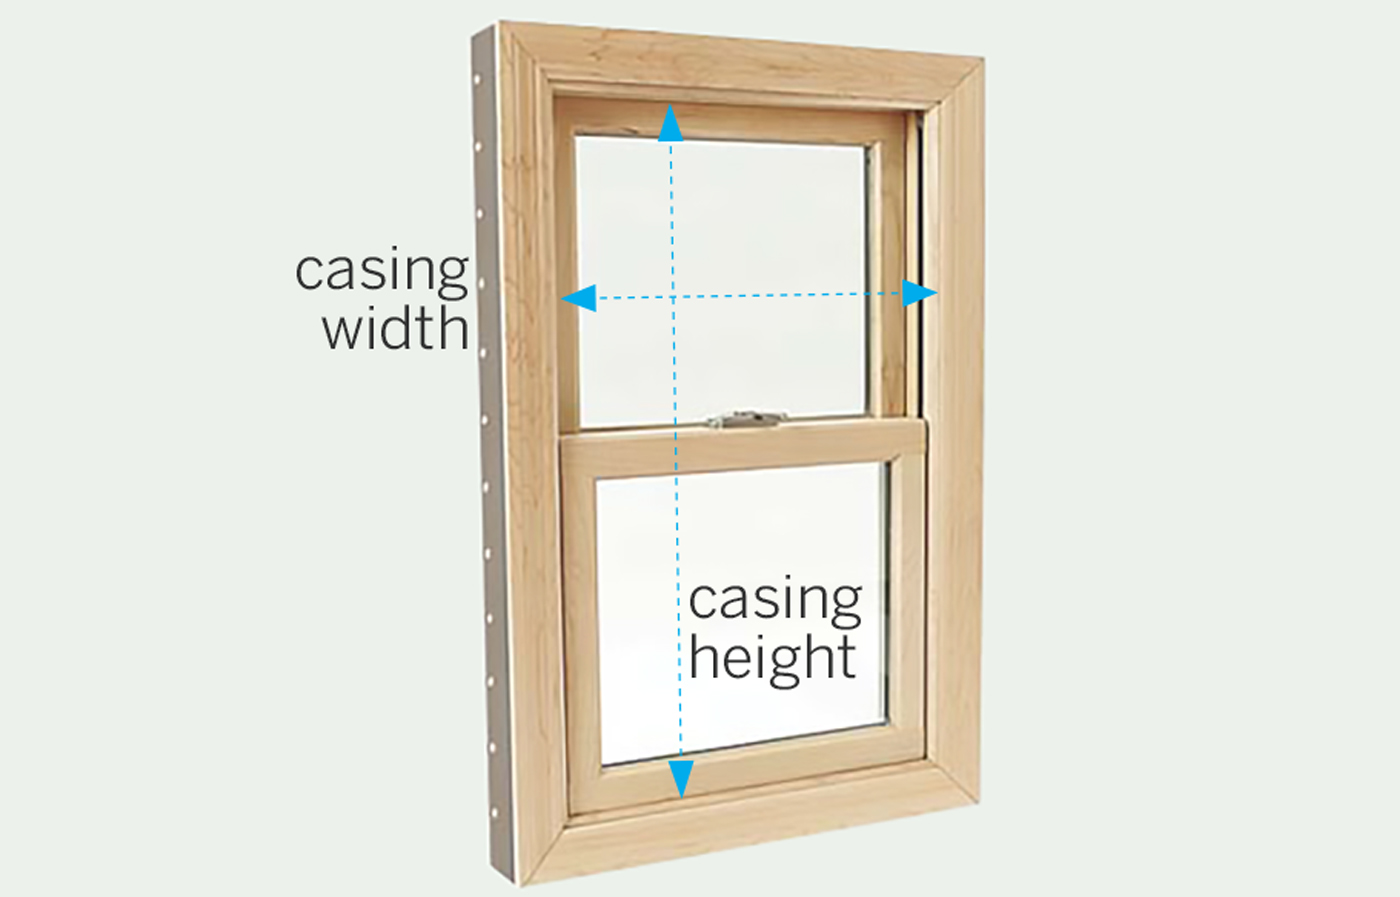
Accurate measurements ensure your new shutters will fit your windows perfectly. For working shutters, measure between the window’s side casings and divide by two, subtracting 1/2 inch for clearance. This measurement will give you the width of each shutter.
To determine the width of individual boards, subtract 1/8 inch for each gap between boards and divide by the number of boards you plan to use. For the height, measure from the head casing to the sill and subtract 1/2 inch for clearance. These precise measurements will help your shutters look proportionate and function correctly if you choose to make them operable.
You should also measure the depth of the window casing to make sure that the shutters will fit properly against the window when closed. This extra step means that the shutters can be flush with the siding or slightly recessed, depending on your design preference.
Step-by-Step Instructions for Building Board-and-Batten Shutters
Once your measurements are taken, you’re ready to begin installing.
Step 1: Cut the Pieces
First, cut the boards and battens to size. This will depend on the size of your opening, but as an example, this is what the cut list would look like for a pair of shutters to fit a window opening 36 3/4 inches wide by 48 1/2 inches high:
- 1/2 x 6 battens: 4 @ 18 inches
- 1/2 x 6 vertical boards: 8 @ 40 inches
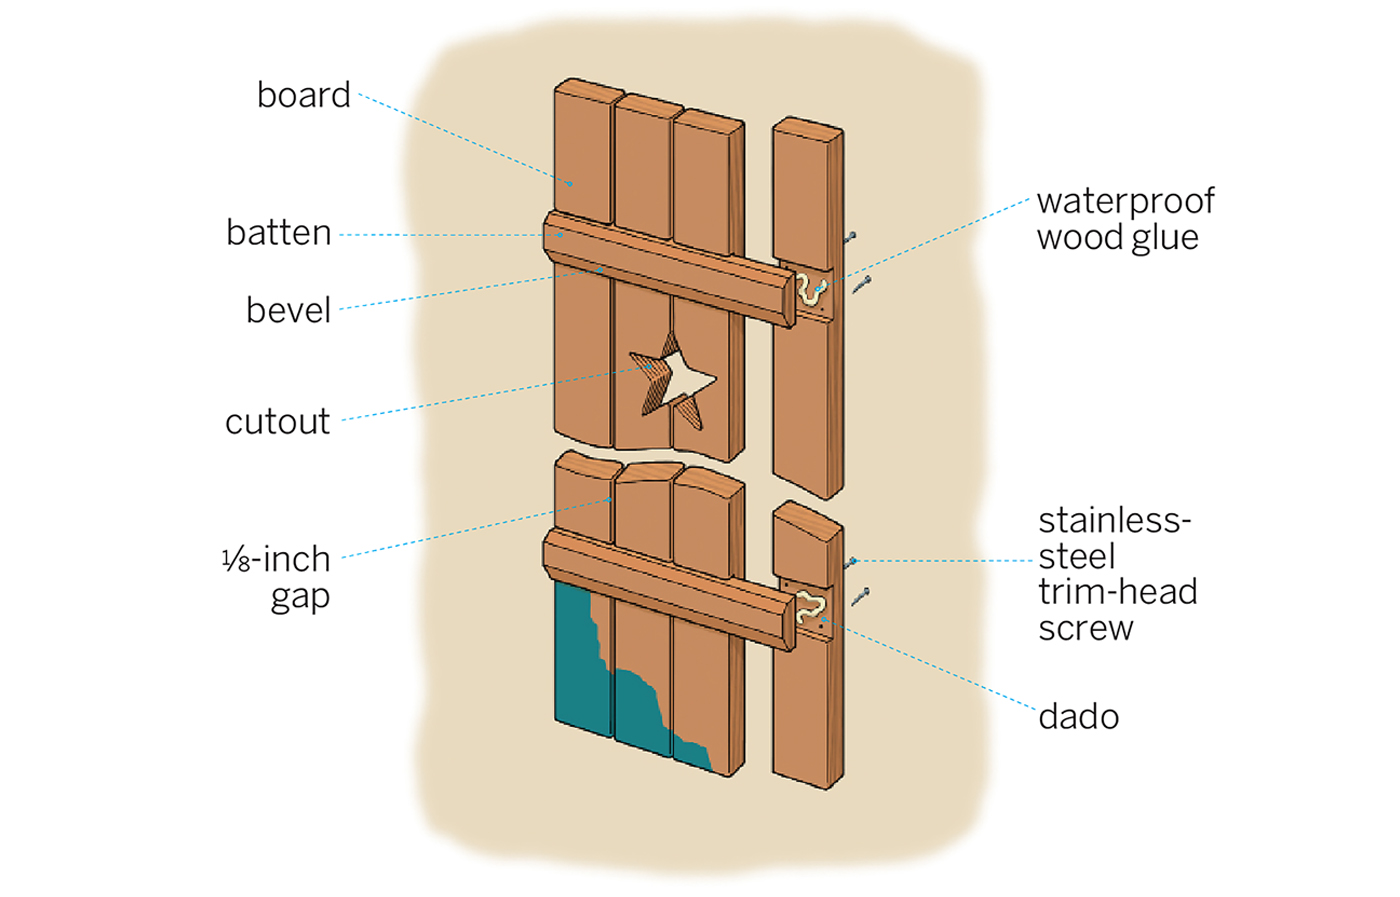
Use a circular saw or table saw to rip the boards to the correct width if necessary. For the battens, rip the stock to match the width of the boards, then create 45-degree bevels along the long edges of one face. This beveled edge adds a decorative touch and helps shed water.
Cut all pieces to their final lengths, making sure they are clean, straight cuts. Remember to wear safety gear, such as eye protection and work gloves, when operating power tools.
If preferred, sand the cut edges to smooth any splinters or rough spots before assembly. Sanding improves the finish and longevity of the wood. Smooth edges prevent moisture from penetrating the wood and help in achieving a more finished look.
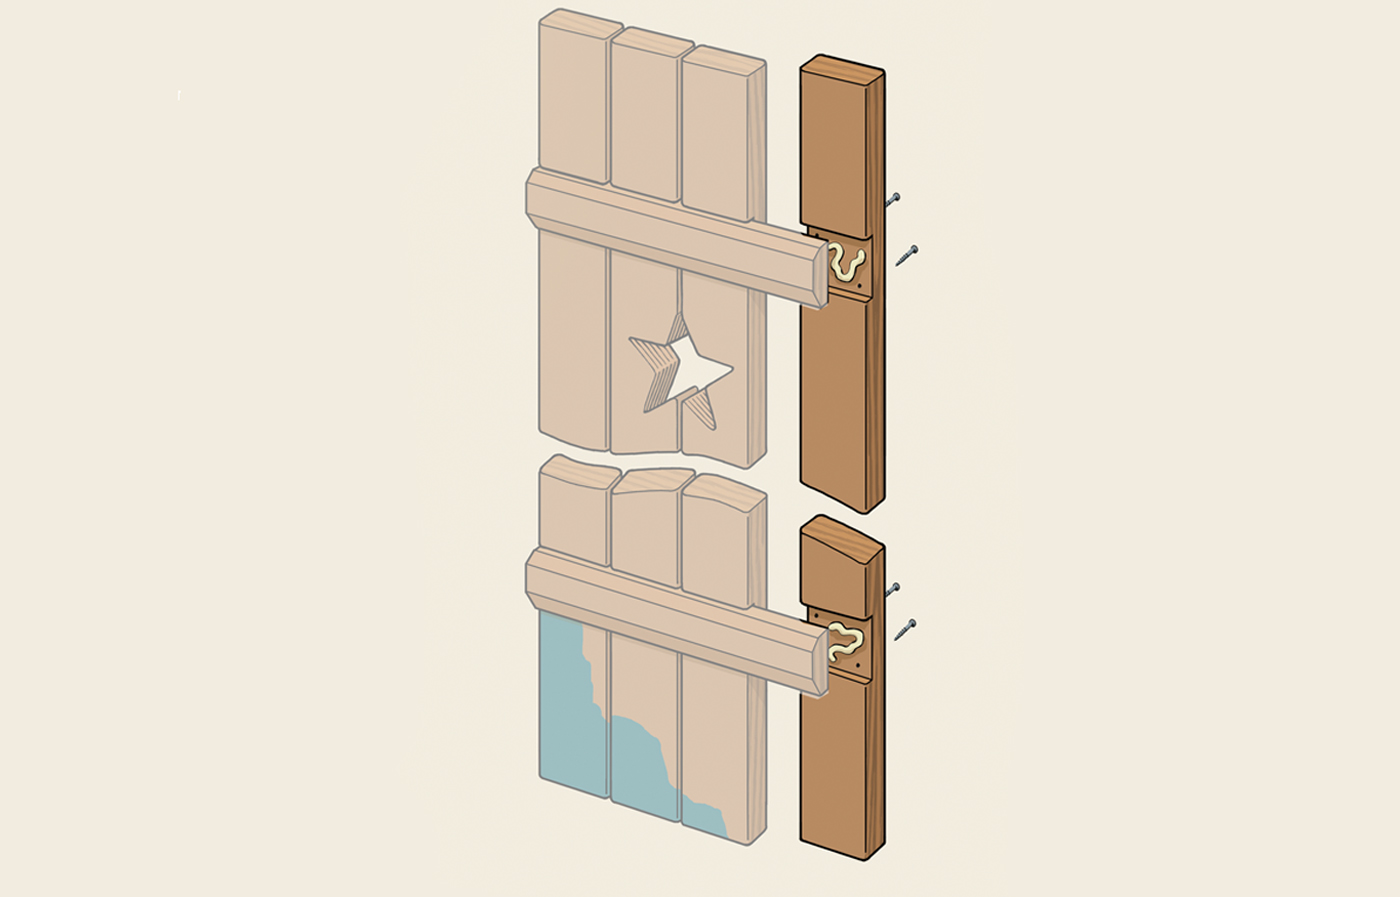
Step 2: Make the Dadoes
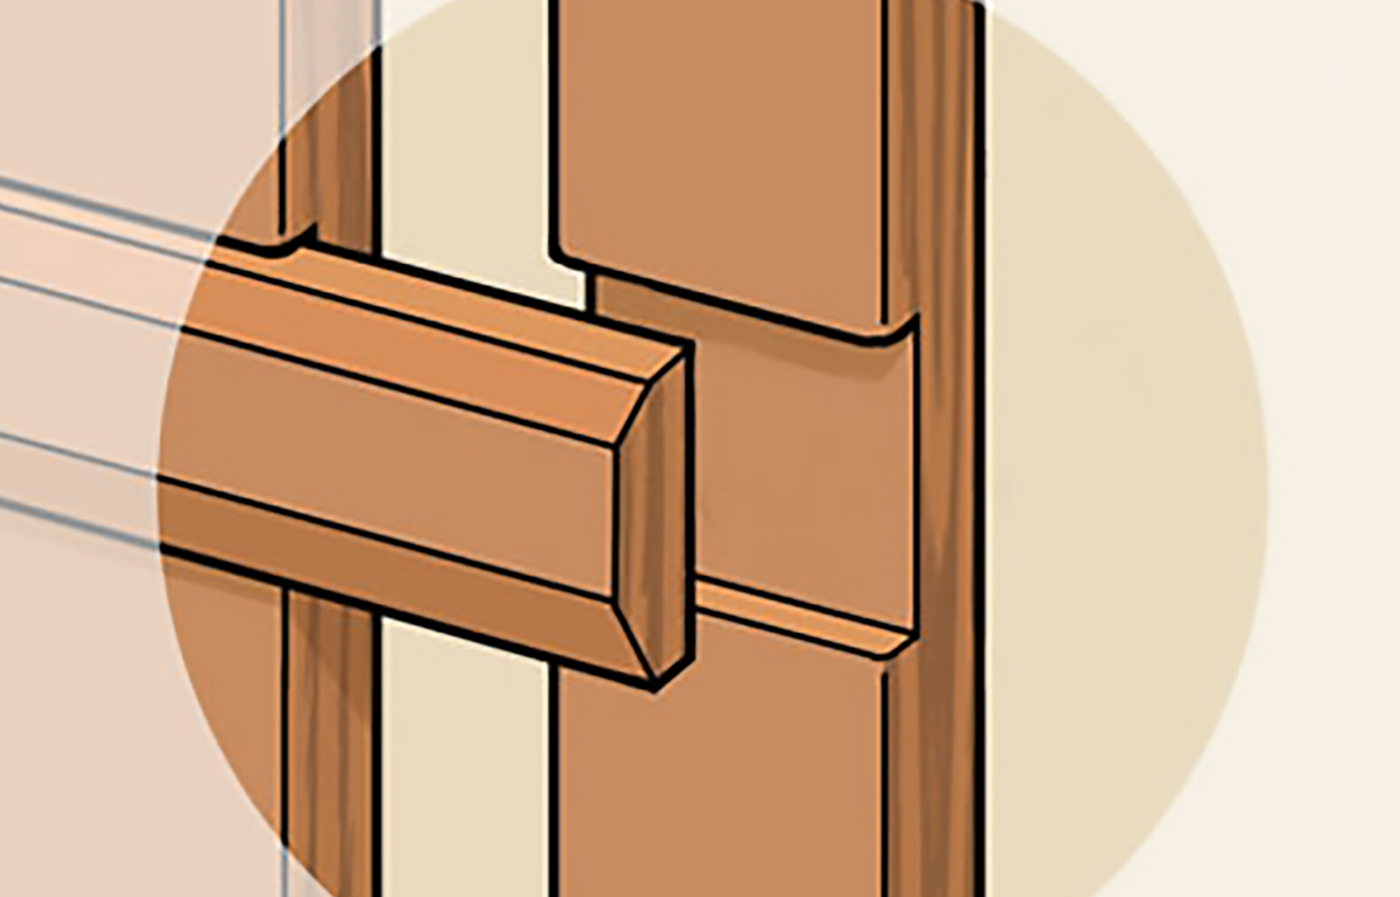
Dadoes are grooves cut across the grain of the wood that will hold the battens in place. To create these, clamp the boards edge to edge and use a straightedge to mark the batten locations at the top and bottom of the shutter. Set your circular saw blade to a depth of 1/8 inch and make multiple passes between the marks to create the dadoes. Use a sharp chisel and mallet to clean up and smooth the bottoms of the grooves. This step leads to a strong, long-lasting connection between the boards and battens.
Check that the dadoes are uniform across each board, as inconsistent grooves can affect the alignment of the battens and weaken the structure over time. Regularly check your saw depth and the straightness of the cuts. Clean, straight dadoes provide a seamless fit for the battens and contribute to the overall sturdiness of the shutters.
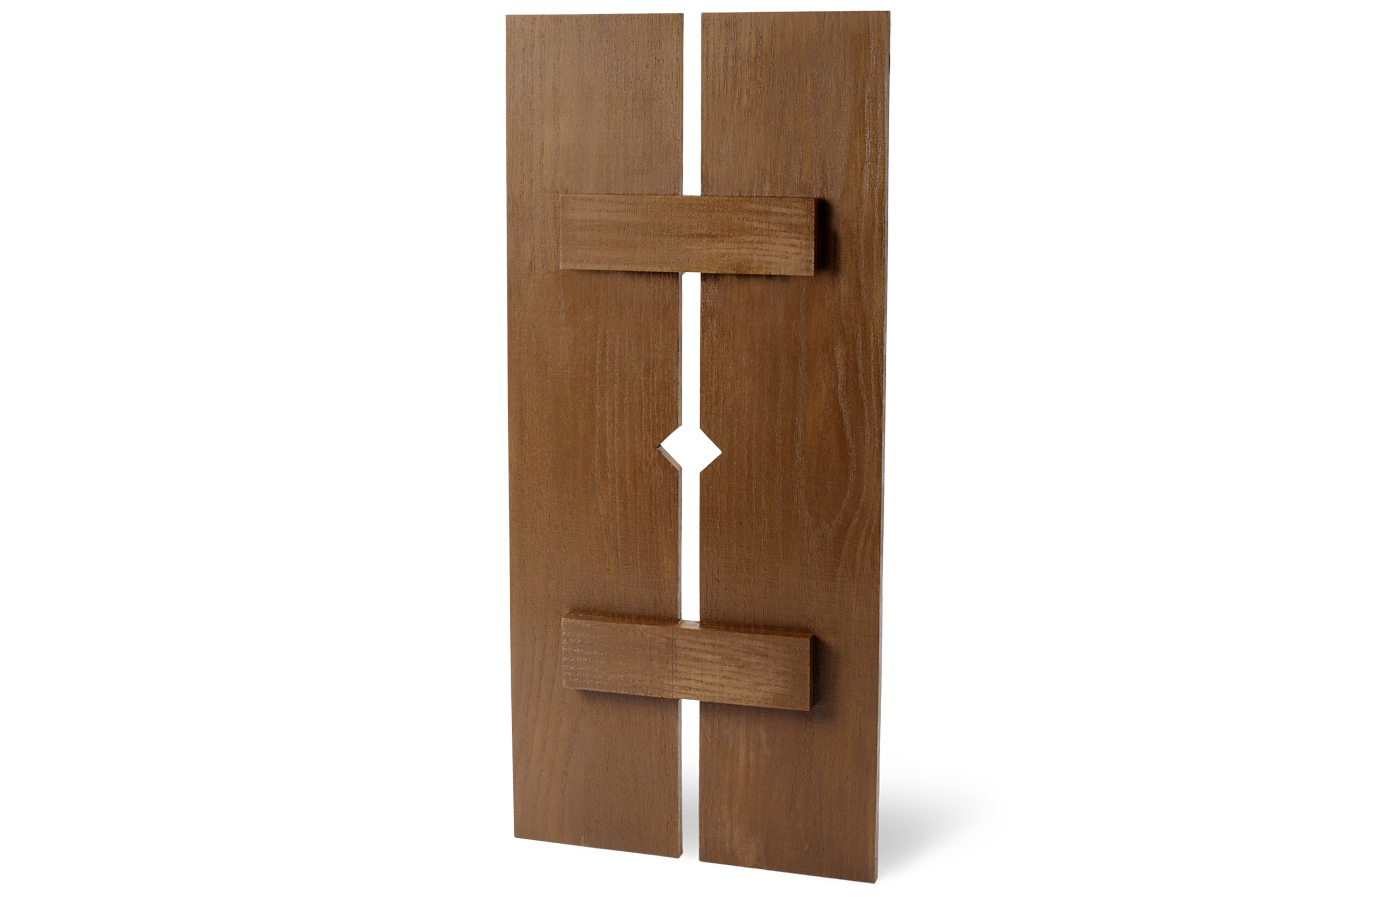
Step 3: Make the Cutout
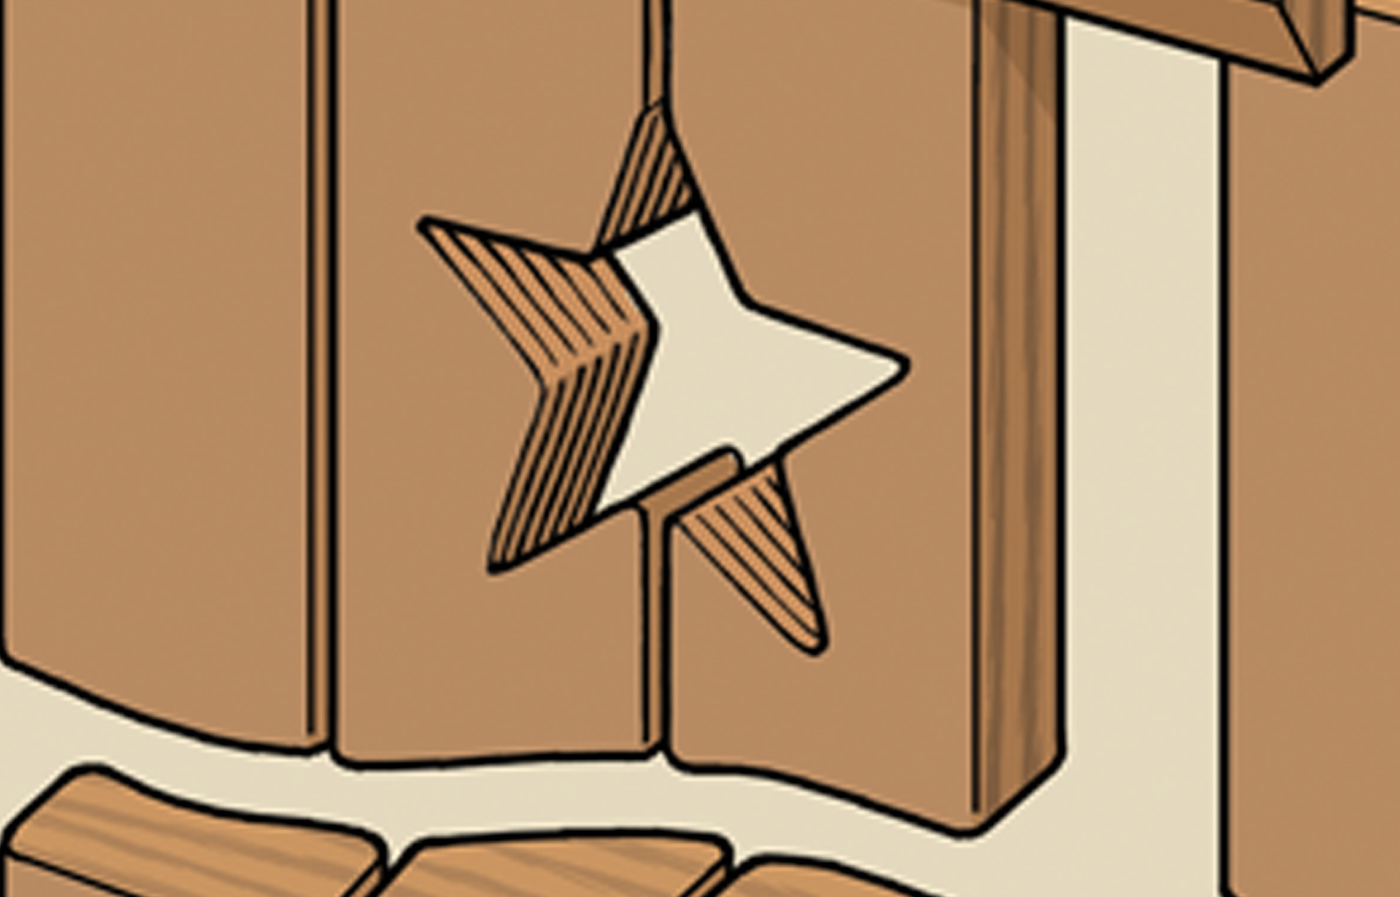
Adding a decorative cutout to your shutters can give them a unique, personalized touch. Create a template for your desired design, making sure it doesn’t extend more than halfway across a single board. Dry-assemble the shutter face-down on a flat surface, using 16D nails as spacers to maintain consistent gaps between boards.
Clamp everything together securely, then center your template over the middle gap and trace the design onto the two middle boards. Disassemble the shutter and use a jigsaw to cut out the shape carefully. Take your time with this step and sand the cut edges smoothly for a professional finish.
Choose a design that complements your home’s style. Popular shapes include hearts, diamonds, and half-moons, but custom designs can make your shutters unique. The cutout not only adds style but also allows a glimpse of light to filter through when the shutters are closed, adding an extra layer of charm.
Step 4: Assemble
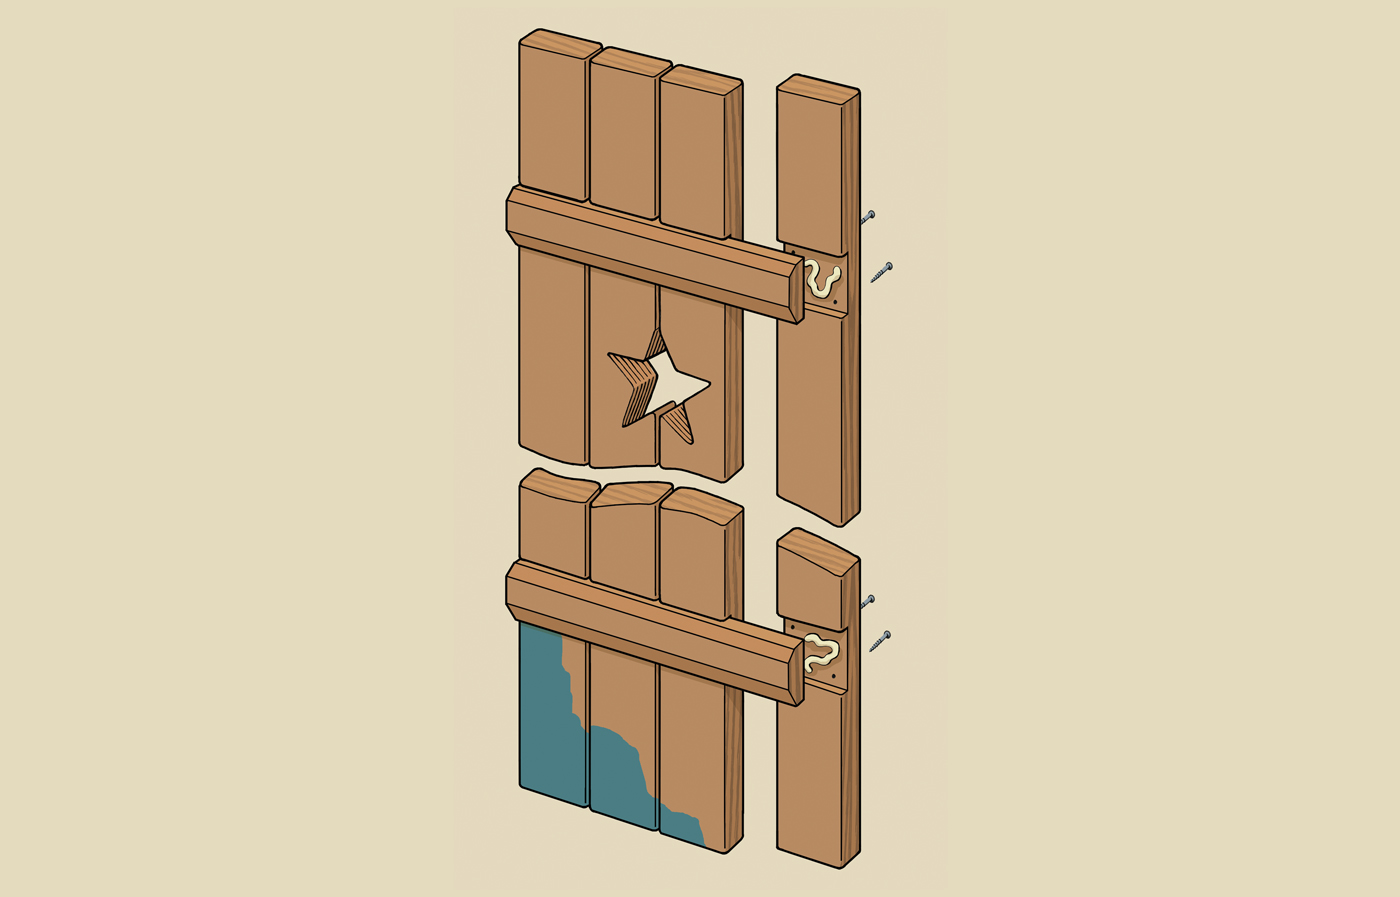
Assembly is the final step in creating your board-and-batten shutters. Place the battens bevel-side down on your work surface. Apply waterproof wood glue to the dadoes of the outer boards and fit them onto the battens, checking that they’re flush at the ends. Secure the boards to the battens using two staggered 1 5/8–inch stainless-steel trim-head screws driven through the back of the boards into the battens. Repeat this process for the center boards, maintaining consistent gaps on both sides. Build the matching shutter following the same steps. Once assembled, allow the glue to dry completely before handling or finishing the shutters.
Make sure that all screws are countersunk to prevent them from snagging on clothing or splintering the wood. Optionally, fill the screw holes with wood putty for a cleaner finish. Once assembled, you can also add additional battens or decorative elements.
Finishing and Maintenance
Proper finishing and maintenance provide help your board-and-batten shutters to look great longer. For wooden shutters, apply a high-quality exterior paint or stain to protect against moisture and UV damage. Choose a finish that complements your home’s exterior color scheme.
Once your finish is applied you can follow our guide to hang your external shutters. Once hung, regularly inspect your shutters for signs of wear, such as peeling paint or loose hardware, and address issues promptly to prevent further damage.
You should also clean your shutters regularly to remove built-up dirt and grime that can degrade the wood or finish. Use a mild soap and water solution, and rinse thoroughly. Repainting or restaining every two to three years helps maintain protection against the elements and keeps your shutters looking their best. Regularly tightening screws and checking for any immediate repairs can prevent more significant issues in the future. You can learn to do external shutter repairs yourself to save time and money.
Premade Board-and-Batten Shutters
If DIY projects aren’t your forte, there are plenty of ready-made board-and-batten shutters available .Basic models often consists of lightweight cast foam with a weathered-wood texture. While you’ll need to apply the stain and protective topcoat yourself, these shutters are an affordable option if you want to upgrade your home’s appearance without spending time building shutters from scratch. Keep in mind that these shutters are decorative and may not be suitable for functional use.
Make sure that the foam shutters you choose are made from high-quality materials that can withstand outdoor conditions. Proper staining and sealing can significantly extend the life of these shutters. Regular maintenance will keep them looking fresh and prevent color fading or texture degradation over time.
Midrange Option
For those looking for a more authentic look and feel, midrange shutters made from Western red cedar are a great choice. Cedar is naturally resistant to decay and insect damage, making it ideal for exterior use. These shutters showcase the wood’s fine, natural grain when treated regularly with deck oil. While more expensive than basic models, cedar shutters offer durability and a classic appearance that can significantly increase your home’s curb appeal. They’re also suitable for both decorative and functional applications.

When selecting midrange shutters, consider different styles available within the cedar option. Stained cedar can add a rich hue to your home’s exterior, or you can opt for painted cedar for a more polished finish. Depending on your climate, applying a UV-protective topcoat can further extend the life of the cedar, helping it remain vibrant and decay-free.
Luxury Option
At the high end of the spectrum are luxury shutters made from solid African mahogany. This premium hardwood is exceptionally durable and has a beautiful grain pattern. Mahogany shutters take paint wonderfully, allowing for a smooth, long-lasting finish in any color. They also have a hardness three times that of western red cedar and can withstand harsh weather conditions.

Though they’re more expensive than other options, mahogany shutters are an investment in quality and longevity that can add significant value to your home. Plus, they’re naturally resistant to insects and decay, so they require less frequent maintenance.
Luxury shutters often include additional customizations, such as more intricate cutouts and detailed hardware like brushed metal hinges or traditional wrought iron fixtures.
Source: https://www.thisoldhouse.com/windows/21016407/how-to-make-board-and-batten-shutters
You may also like

